
Pom Pom DIY


The last DIY I did was how to make a tassel garland (see here) and since then I have made the pom poms to match! You might remember pom poms taking ours to make, but this clever trick will have you making them in just minutes!


To make your pom poms you will need:


I found that the salad tossers were too wide (as I wanted smaller pom poms) so I got my dad to cut off one side and also made the grooves longer so it was more accessible, but do not worry if yours doesn't look like this.

So let's get started!
1. Wrap the wool around the fork so that there will be layers of wool on top of each other. I wrapped the wool around it about 60 times so that the pom pom is nice and full, but depending on the thickness of your wool you can do more or less.

2. Cut off the strand of wool from the ball and wrap it around the fork one last time.

3. Cut a new short piece of wool (about 15cm long) and thread it through the hole/groove in the wood, tying it in a double knot around the wrapped up wool. This does not have to be extremely tight but just enough to keep the wool in its shape.

4. Wriggle the wool off of the wood so it looks like two semicircles as shown above. It might be a bit hard to get the wool off the fork because of the friction but continue to pull at each side until it comes off.

5. Cut another longer piece of wool (around 50cm this time - these will become the strings that your pom pom hangs from, so if you would like to have these longer, do so now) and tie it around the centre between the two semicircles, going over the top of the temporary tie you made in step 3. Make sure that you pull as tight as possible before making a double knot so that the centre of the pom pom stays secure. Do not cut off the two long pieces of wool which are now hanging from the centre of the pom pom.

6. To open up your pom pom, cut both sides by putting one side of you scissors through the semicircular loop and cutting all the way around and repeat on the other side.

7. Your pom pom should now look something like this. The two longer strands can be used for hanging your pom pom up for display.


And you're finished!
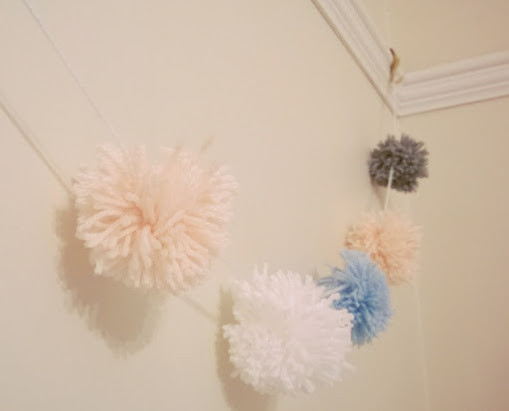
Make lots in different colours as a fun decoration for any room.
I went on to make mine into a cute garland. To do the same just lie out a long piece of wool and evenly space out the pom poms (I did this on the floor so I had plenty of room). Then using the two longer pieces of wool on the pom pom, tie in a double knot, then cut off excess wool. Tie a loop at each end of the long piece of wool when all pom poms are attached so you can hang it up.


I hope you enjoyed this tutorial and I would love to see if you tried making some yourself, feel free to leave a comment down below.
Sofia xx
Social Media
Keep up to date with what I am up to and what I am loving at the moment by following my social media:
Social Media
Keep up to date with what I am up to and what I am loving at the moment by following my social media: